Toilet Drain Fix Water Drains After Flush
Water drains from toilet bowl after flushing? This guide breaks down why and how to fix it. We’ll cover everything from identifying the problem to troubleshooting common causes and even preventative maintenance. From different flapper types to clogs and water supply issues, we’ll walk you through each step, helping you tackle this plumbing problem head-on.
Toilet flushing is a pretty straightforward process, but sometimes things go wrong. Understanding how a toilet works—from the water supply to the flush valve and flapper—is key to figuring out why your toilet isn’t behaving as expected. Knowing how to visually inspect the toilet, check the water supply and connections, and test the flush valve and flapper are essential steps. By methodically examining each component, you can quickly zero in on the problem.
Identifying the Problem
Source: toilethaven.com
A toilet that drains water from the bowl after flushing is a common plumbing issue. This can range from a minor annoyance to a more significant problem depending on the cause. Understanding the normal flushing mechanism and the various ways this issue can manifest is key to diagnosing the problem and implementing the right solution.
This guide will detail the different scenarios of water draining from a toilet bowl after flushing, from simple clogs to more complex issues. We’ll also examine the different types of toilets and their typical flushing processes, highlighting the expected behavior of a functional unit and comparing it to the observed behavior when the problem occurs.
Toilet Flushing Mechanisms
Different toilet types utilize various flushing mechanisms. Standard gravity-fed toilets use a large water reservoir in the tank. When the handle is pressed, a mechanism releases water into the bowl, creating a force that flushes the waste. More modern toilets, including some dual-flush models, may use a combination of gravity and pressure. Understanding these mechanisms helps in determining if the observed draining behavior is typical or abnormal.
Expected vs. Observed Behavior
A functional toilet will fill the bowl with water after flushing and maintain this water level until the next flush. The water will not drain prematurely from the bowl after the flush cycle. If water drains away from the bowl quickly after flushing, this indicates a problem with the toilet’s components, the water supply, or the drain line.
Manifestations of the Problem
Water draining from the toilet bowl after flushing can manifest in several ways:
- The water level in the bowl rapidly decreases after the flush, leaving the bowl almost empty.
- The water drains out of the bowl in a continuous stream, rather than a controlled flush.
- The bowl remains partially filled but loses water noticeably faster than normal after the flush cycle.
These different manifestations can give clues to the root cause of the issue.
Common Factors Contributing to Premature Drainage
Several factors can lead to water draining from the toilet bowl prematurely:
- Clogged Drain Lines: Obstructions in the drain lines can prevent water from properly draining, potentially causing a quick drain after flushing.
- Faulty Flush Valve or Mechanism: A malfunctioning flush valve, chain, or other components can lead to inefficient water usage and rapid drainage from the bowl.
- Low Water Supply: An insufficient water supply to the tank will not allow the bowl to fully refill after flushing. This is a common reason for the issue.
- Damaged or Leaking Toilet Components: Cracks or leaks in the bowl or tank can cause water loss, leading to premature drainage after flushing.
Potential Problem Areas
The following table categorizes potential causes for the observed behavior:
| Problem Area | Possible Causes |
|---|---|
| Water Supply | Low water pressure, insufficient water supply, leaky supply lines |
| Flush Valve/Mechanism | Malfunctioning flush valve, broken chain, faulty flapper |
| Drain Line | Clogged drain lines, obstructions, low drain pipe slope |
| Toilet Bowl/Tank | Cracked bowl or tank, leaks, improper sealing |
Flowchart of a Typical Flush
The following flowchart illustrates the steps in a typical toilet flushing process. Understanding this process helps in identifying deviations and potential causes for the problem.
“`
[Start] –> [Handle Pressed] –> [Flush Valve Opens] –> [Water Enters Bowl] –> [Water Flushes Waste] –> [Flush Valve Closes] –> [Bowl Refills] –> [End]
“`
Troubleshooting the Issue

Source: bathroomnerd.com
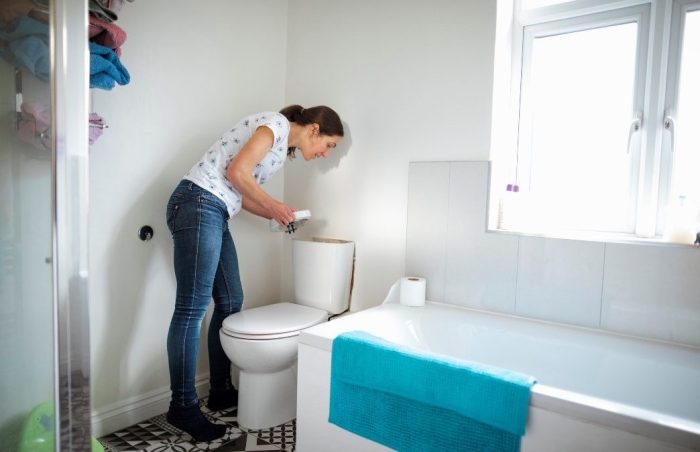
Once you’ve identified the problem with your toilet’s flushing mechanism, the next step is to diagnose the specific issue and implement the appropriate troubleshooting steps. This often involves visually inspecting the internal components and checking various connections. A thorough examination can pinpoint the root cause and guide you toward an effective solution.
Visual Inspection of Internal Components
A thorough visual inspection of the toilet’s internal components is crucial for identifying potential problems. Carefully examine the bowl, tank, and all visible connections. Look for any obvious signs of damage, wear, or blockage. This initial step provides valuable insight into the potential cause of the slow or non-functioning flush. This involves inspecting the tank for cracks, leaks, or loose connections.
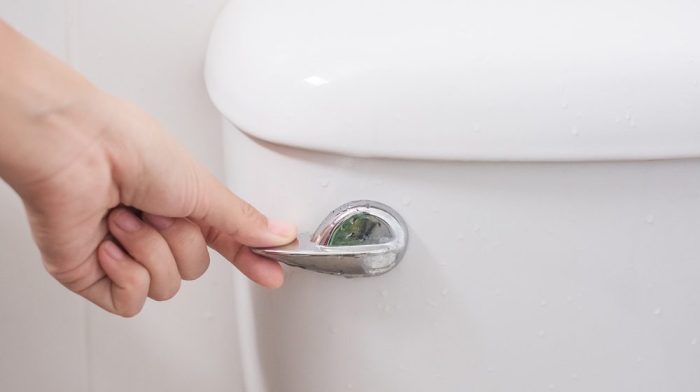
Checking the Water Supply Valve and Connections
The water supply valve is essential for regulating water flow into the toilet tank. Inspect the valve and its connections for leaks or loose fittings. Look for drips or a continuous flow of water, which can indicate a faulty valve or loose connections. A steady drip, for instance, might mean a loose connection needs tightening, while a continuous flow often signals a malfunctioning valve that requires replacement.
Checking the Flush Valve and its Seal
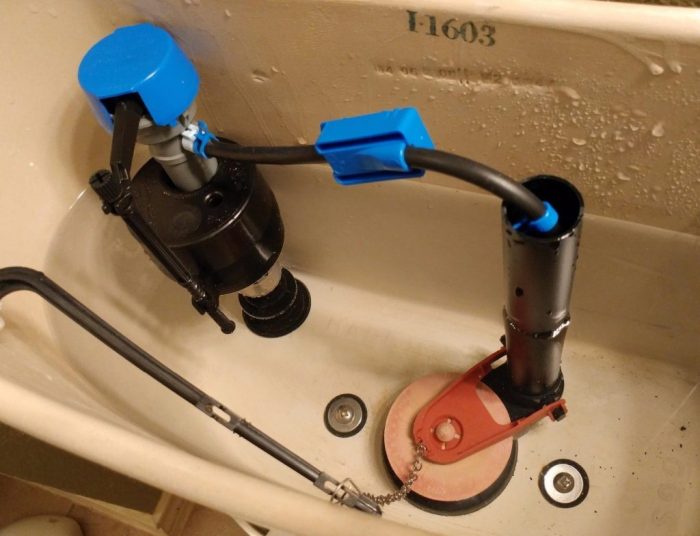
The flush valve is responsible for controlling the release of water from the tank into the bowl. Inspect the flush valve and its seal for any damage, wear, or cracks. A faulty seal can result in a slow or incomplete flush. A common cause of this is a worn-out seal that needs replacement.
Verifying the Chain and Connection to the Flush Mechanism
The chain connects the flush lever to the flush mechanism. Check the chain for any kinks, breaks, or excessive wear. A broken or tangled chain will prevent the flush valve from opening properly. If the chain is too long, it can also create issues. Ensure the chain is correctly attached to both the flush lever and the flush mechanism.
Assessing the Condition of the Flapper or Flapper Chain
The flapper or flapper chain is critical in preventing water from flowing back into the tank. Check the flapper for tears, holes, or cracks. If the flapper is damaged, it won’t seal properly, causing a slow flush or a constant dripping sound. A worn-out flapper chain can also affect the flapper’s function.
Comparison of Flapper Types
| Flapper Type | Functionality | Pros | Cons |
|---|---|---|---|
| Standard Flapper | Simple, inexpensive design that seals the tank opening. | Easy to install, widely available. | Can wear out quickly, and may not seal as tightly as other types. |
| Ball Flapper | A more durable design with a ball-shaped seal. | More resistant to wear and tear than standard flappers. | Can be slightly more expensive. |
| Soft-Close Flapper | Provides a quieter flush by closing more gradually. | Reduces noise and water usage compared to other types. | Slightly more expensive. |
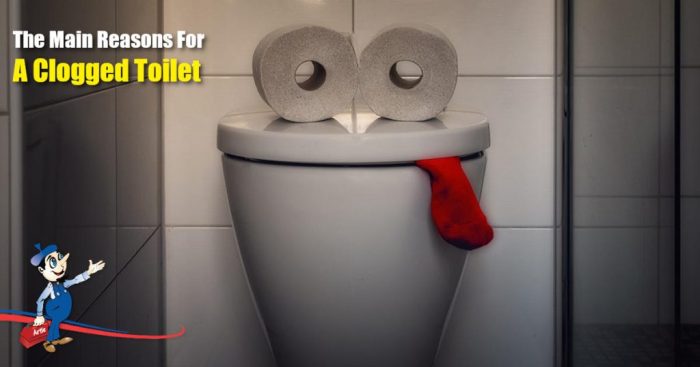
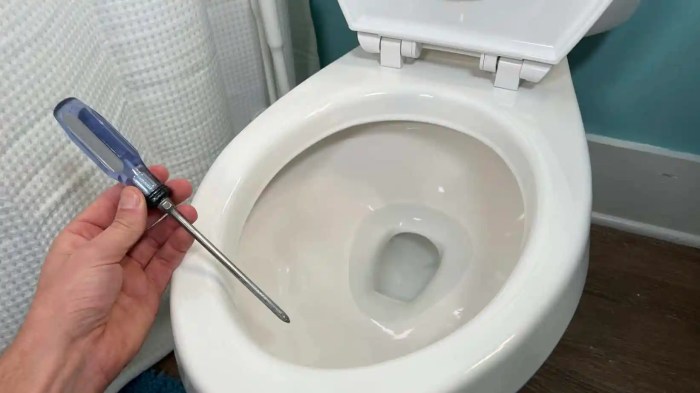
Checking for Clogs or Blockages in the Drain Lines
Blockages in the drain lines can also lead to flushing issues. Check for clogs or debris in the drain lines. This could involve using a plumbing snake to clear any obstructions. Check for any debris that may be accumulating in the drain pipe that’s connected to the toilet.
Potential Solutions

Source: merchantnavydecoded.com
Fixing a leaky or malfunctioning toilet can feel daunting, but with a little know-how, you can tackle most problems yourself. This section details how to replace parts, address clogs, and resolve water supply issues, equipping you with the DIY skills to get your toilet working perfectly again.
Replacing the Flapper
The flapper is a crucial component that controls the flow of water into the toilet bowl after flushing. A faulty flapper is a common culprit behind slow draining or continuous dripping. Replacing it is a straightforward process. First, turn off the water supply to the toilet. Locate the shut-off valve, usually under the tank, and turn it clockwise to stop the flow. Next, carefully remove the old flapper by gently pulling it away from the tank. Choose a new flapper that matches the size and type of your existing one. Carefully insert the new flapper into the tank and ensure it fits snugly in the mounting mechanism. Re-connect the water supply, turn on the valve, and test the flushing action.
Addressing Clogs or Blockages in the Drain Lines
Clogs in the drain lines can prevent proper flushing. Use a plunger to dislodge blockages in the bowl itself. If that doesn’t work, consider using a drain snake. Insert the snake into the drain opening and carefully rotate it to dislodge any obstructions. Avoid using harsh chemicals, as they can damage the pipes. If the clog persists, you might need to enlist professional plumbing help.
Resolving Issues with the Water Supply Valve
A malfunctioning water supply valve can cause a toilet to constantly run or not fill properly. Locate the water supply valve under the toilet tank. If it’s dripping, the valve may need tightening. If it’s not delivering water, you might need to replace the valve itself. Be cautious when working with water supply valves, as a sudden leak can cause damage.
Fixing Problems Related to the Flush Valve
The flush valve, sometimes called a fill valve, controls the amount of water that enters the tank. A problem with this valve can lead to a toilet that doesn’t fill or flushes incorrectly. If water is consistently running, check the valve’s float mechanism. Ensure the float is adjusted correctly. If the issue persists, consider replacing the valve.
Repairing Chain or Chain Connections, Water drains from toilet bowl after flushing.
A worn-out chain or a loose connection can affect the flush mechanism. If the chain is too short, it won’t properly operate the flush valve, and if it’s too long, it can get tangled. A loose connection could prevent the chain from activating the valve. Replace the chain with a new one that matches the size and design of your toilet. Ensure the chain is properly connected to the handle and the flush valve. If the problem persists, consult a professional plumber.
Summary Table of Common Causes and Solutions
| Problem | Possible Cause | Solution |
|---|---|---|
| Toilet won’t flush | Clogged drain lines, faulty flapper, loose chain | Use a plunger or drain snake, replace the flapper, and adjust or replace the chain. |
| Toilet constantly runs | Faulty water supply valve, malfunctioning fill valve, incorrect float adjustment | Tighten the valve, replace the valve, adjust the float |
| The toilet fills slowly or incompletely | Clogged drain lines, faulty fill valve, air in the pipes | Clear clogs, replace fill valve, check for air in pipes |
Prevention and Maintenance: Water Drains From Toilet Bowl After Flushing

Source: sprucebathroom.com
Keeping your toilet in tip-top shape isn’t just about fixing problems; it’s about preventing them in the first place. Regular maintenance and smart habits can save you a lot of frustration and potential plumbing emergencies. Proactive measures like preventing clogs and leaks will save you time, money, and a headache.
Preventing Leaks and Blockages
Proper toilet maintenance involves preventing clogs and leaks, which are often the root cause of plumbing issues. A well-maintained toilet system minimizes the risk of these problems. By understanding how your toilet works and implementing preventative measures, you can maintain optimal performance.
One key aspect is avoiding unnecessary amounts of water in the toilet bowl. Too much water can lead to overflow and potential leaks.
- Avoid Flushing Excessive Waste: Don’t overload the toilet with items it’s not designed to handle. This includes large amounts of paper, feminine hygiene products, or other non-flushable items.
- Use the Right Amount of Water: If your toilet has an adjustable water level, make sure it’s set appropriately. Too much water can lead to leaks and unnecessary water usage.
- Inspect for Leaks: Regularly check for any signs of leaks around the base of the toilet, the water supply line, or the tank. Even small leaks can lead to significant water waste over time.
Regular Maintenance Schedule
Regular maintenance is crucial for a toilet’s optimal performance and longevity. Consistent upkeep helps to identify and address minor issues before they escalate into major problems.
| Task | Frequency |
|---|---|
| Inspect for leaks (around base, supply line, tank) | Monthly |
| Check water level (if adjustable) | Quarterly |
| Clean the bowl and tank | Bimonthly |
| Inspect the flapper and chain (if applicable) | Semi-annually |
| Flush test | Monthly |
Proper Disposal of Household Items
Knowing what to flush and what to avoid is essential to preventing clogs. Improper disposal can lead to significant plumbing issues.
- Flushing Guidelines: Only flush toilet paper, and small amounts of liquid waste. Avoid flushing feminine hygiene products, wipes, cotton swabs, grease, cooking oil, or other non-flushable items.
- Proper Disposal Options: For non-flushable items, use the trash can or designated recycling bins. Many cities have specific guidelines for disposing of hazardous waste. Check your local guidelines for proper disposal.
Avoiding Excessive Water in the Toilet Bowl
Overfilling the toilet bowl with water is a common cause of problems. It can lead to overflows, leaks, and inefficient use of water resources.
- Limit Waste Quantity: Don’t overfill the toilet with paper or other materials. Ensure that the amount of waste you flush is manageable for the toilet’s capacity.
- Check Water Level: If your toilet has an adjustable water level, make sure it’s set to the appropriate level for your home’s plumbing system.
Proper Flushing Techniques
Proper flushing techniques are essential for effective waste removal and prevention of clogs. Understanding how to use your toilet effectively helps avoid unnecessary problems.
- Flush Force: A firm push on the flush lever or button is necessary for effective flushing. Avoid using excessive force, as this can potentially damage the system.
- Flush Timing: Wait the necessary time for the flush cycle to complete. Avoid immediately flushing again before the cycle is finished.
Preventing Debris Accumulation
Regular cleaning and maintenance help prevent the buildup of debris around the toilet. This debris can lead to clogs and other problems.
- Clean Regularly: Clean the area around the toilet, including the floor, regularly to remove any debris. Clean the base of the toilet periodically.
- Keep the Area Clear: Maintain a clear space around the toilet to prevent obstructions. Keep the area clean and clear of any items that may fall into the toilet.
Illustrations and Examples
Source: proserveplumbers.com
Let’s dive into the visual side of toilet plumbing! Understanding how everything works visually can make troubleshooting a lot easier. We’ll break down the toilet system, flapper types, water flow, clogs, and component inspection, complete with diagrams.
A Functional Toilet System
A toilet’s plumbing system is a closed loop. Water is stored in a tank, and when you flush, the water pushes the waste through a drain pipe and away from your home. The key components work together to make this happen smoothly. The tank holds the water, and a flapper, float, or other mechanism controls the water release. The bowl’s trap design prevents sewer gases from entering your home.
Flapper Types
Different types of flappers exist, each with unique designs and functions. Understanding these variations is important for proper replacement and maintenance.
- Ball Flappers: These are the most common type. A simple rubber ball seals the water valve opening when not flushing. The ball’s shape creates a tight seal, and its simple design makes them easy to install and maintain. They are often the least expensive option.
- Diaphragm Flappers: These flappers use a rubber diaphragm to seal the water valve opening. They often provide a better seal than ball flappers, leading to less water usage and reduced chances of leaks. They tend to be a bit more expensive than ball flappers.
- Chain-and-Bucket Flappers: A chain connects a lever-style float to a bucket. This lever opens and closes the flapper valve to release water. While less common, these still function properly if well-maintained, but they can be less efficient than ball or diaphragm flappers.
Water Flow Through the Toilet System
Water flows from the tank to the bowl through a crucial pathway. The flapper’s opening and closing are fundamental to this process. The float controls the water level, and when you flush, the mechanism activates, causing the flapper to open, releasing water into the bowl. The force of the water pushes the waste into the drain.
Types of Clogs
Clogs can interrupt the smooth flow of water, leading to flushing issues. Different materials and objects can cause clogs.
- Solid Clogs: Large pieces of toilet paper, feminine hygiene products, or even small toys can jam the drain. These can prevent water from passing through completely.
- Sludge Clogs: Accumulation of hardened waste can create a solid blockage in the drain.
- Foreign Object Clogs: Anything that isn’t intended for the toilet, like toys or plastic bags, can get stuck in the pipes and disrupt the flow.
Inspecting Toilet Components
Regular inspection of the toilet’s components helps prevent future problems.
- Tank Inspection: Check the flapper, float, and any connecting parts for damage, wear, or blockages. Examine the tank for any leaks or cracks.
- Bowl Inspection: Look for any visible clogs or debris in the bowl. Ensure the trap is properly positioned.
Diagramming Connections
Visual representations of the connections between components help understand the system.
| Component | Description |
|---|---|
| Tank | Stores water |
| Flapper | Controls water release |
| Float | Maintains water level |
| Bowl | Holds waste and traps sewer gases |
| Drain Pipe | Carries waste away |
Identifying the Right Flapper
To find the right flapper for your toilet model, consult your toilet’s manual or look up the model number online. Many resources will provide diagrams or specifications to guide you.
Final Review
Source: everydayhomerepairs.com
So, water draining from your toilet bowl after flushing? We’ve covered the potential causes, from flapper issues to clogs and supply valve problems. Hopefully, this guide has given you the tools to identify the source of the problem and fix it yourself. Remember, regular maintenance is key to keeping your toilet functioning smoothly. By following the troubleshooting steps and prevention tips, you’ll be well-equipped to handle any toilet troubles that come your way, ensuring your bathroom stays reliably clean and functional.