Shower and Toilet Overflowing Fix It Now!
Shower and toilet overflowing? Don’t panic! This guide breaks down everything you need to know about dealing with those pesky plumbing issues. We’ll explore potential causes, from clogged drains to faulty pipes, and walk you through troubleshooting and repair steps. Plus, we’ll cover prevention strategies to keep your plumbing happy and avoid future disasters.
From identifying the source of the problem to performing DIY repairs or knowing when to call a pro, this comprehensive guide covers it all. We’ll also cover essential plumbing system knowledge, emergency procedures, and ways to prevent future overflows. Get ready to tackle those overflowing drains and toilets like a pro!
Identifying the Cause of the Overflow

Source: co.uk
Overflowing showers and toilets can be frustrating and inconvenient. Knowing the cause is the first step towards effective repair. This section details potential culprits and how to pinpoint the problem.
Understanding the plumbing system is key to diagnosing overflow issues. Water flows through pipes and drains, and obstructions anywhere along the path can lead to backups. The plumbing system is interconnected, and a problem in one area can affect others.
Potential Causes of Overflow
Plumbing systems have several components, each susceptible to issues causing overflows. Identifying the precise source is crucial for accurate repairs.
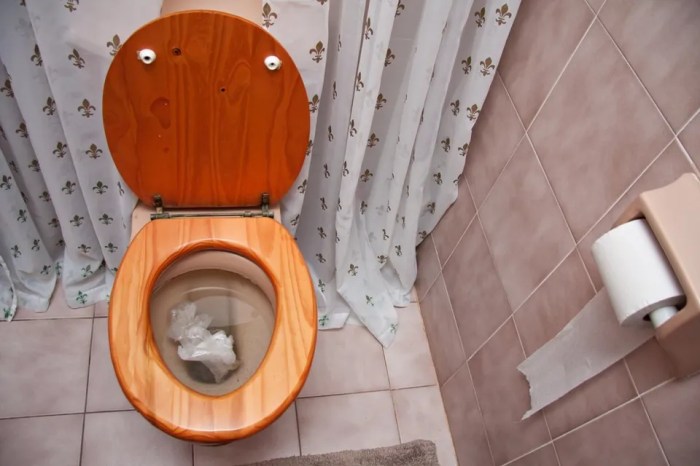
- Clogged Drains: Hair, soap scum, and other debris can accumulate in shower and toilet drains, creating blockages. This buildup restricts water flow, leading to overflows. Signs include slow draining, a gurgling sound, and eventually, water backing up. A clogged drain is a common culprit and often the easiest to fix.
- Faulty Pipes: Cracks, leaks, or kinks in the pipes can cause water to escape and potentially overwhelm the drain system. This can lead to a steady drip, a slow but persistent leak, or a sudden burst. Identifying a leak might be harder, but it’s essential to note any unusual moisture buildup around the pipes.
- Clogged Traps: Toilet and shower traps are crucial for preventing sewer gases from entering the house. A clogged trap can impede the proper flow of water, causing an overflow. This is a common cause for toilet overflows, characterized by water backing up or pooling in the bowl.
- Low-Hanging Pipes: Pipes that are positioned too low can lead to overflow problems. The weight of water can exert pressure on the pipe, leading to a leak or a sudden surge of water. The pipe may appear visibly damaged, or the leak may be hidden, causing persistent dampness around the area.
- Inadequate Drainage System: A poorly designed or clogged drainage system can lead to slow drainage and overflow. This is common in older homes with aging infrastructure, leading to water backing up in the system.
Methods for Identifying the Cause
Pinpointing the specific cause of an overflow involves a systematic approach. Don’t rush; a careful assessment prevents unnecessary expense.
- Visual Inspection: Inspect the affected area for obvious signs of damage, leaks, or clogs. Look for cracks, bulges, or pooling water around pipes and fixtures. This initial visual inspection often uncovers the source of the problem.
- Basic Troubleshooting: Start with simple steps to eliminate the most obvious causes. Try using a plunger on the drain to dislodge any clogs. Check for any unusual sounds or leaks that may indicate a more complex problem.
- Professional Assessment: If the problem persists or you feel uncomfortable tackling the issue, contact a qualified plumber. A plumber can perform a more thorough inspection and identify any hidden issues that might be causing the overflow.
Cause Comparison Table
The table below provides a concise comparison of the different overflow causes.
| Cause | Frequency | Severity | Typical Repair Cost |
|---|---|---|---|
| Clogged Drain | High | Low | $50-$200 |
| Faulty Pipes | Medium | Medium-High | $200-$1000+ |
| Clogged Traps | Medium | Medium | $100-$500 |
| Low-Hanging Pipes | Low | Medium-High | $200-$1000+ |
| Inadequate Drainage System | Low | High | $500-$5000+ |
Troubleshooting and Repair Procedures
Source: sunriseheatingcooling.com
Overflowing showers and toilets can be a real pain, but don’t despair! This section provides practical steps to diagnose and fix these plumbing problems. By following these instructions, you can tackle these issues efficiently and effectively.
Understanding the potential causes of the overflow is the first crucial step in any repair. Identifying the root cause will allow you to target the precise area requiring attention, saving you time and effort. This section will Artikel troubleshooting methods, repair procedures, and provide step-by-step guides for both shower and toilet overflows, as well as drain unclogging.
Shower Overflow Troubleshooting
Identifying the cause of a shower overflow often involves a methodical inspection. First, examine the shower drain for any visible blockages, like hair, soap scum, or debris. If a blockage is present, try using a drain snake or a plumber’s snake to dislodge the obstruction. If the blockage persists, the issue might lie further down the drain line.
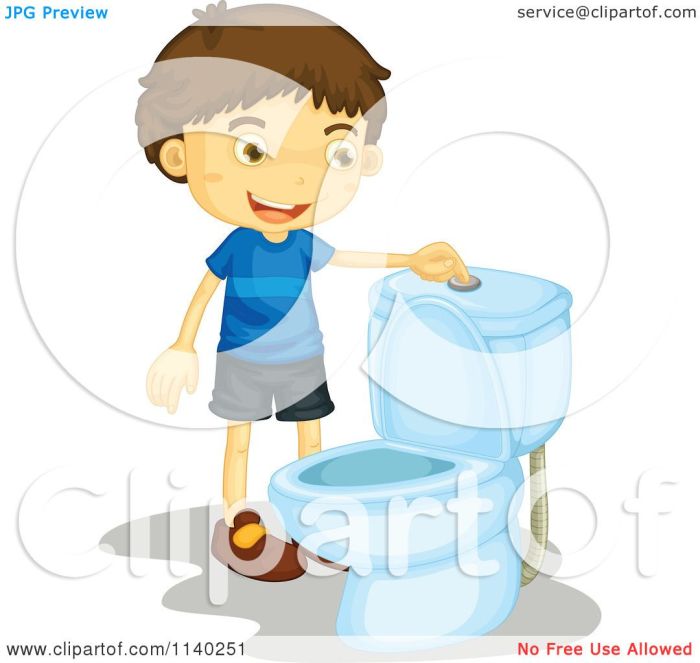
Toilet Overflow Troubleshooting
Toilet overflows often indicate a problem with the bowl’s water level. Examine the fill valve and flapper for any issues. A faulty flapper may allow water to continuously enter the bowl, leading to overflow. Alternatively, a clogged drain line can cause the overflow. If the problem persists, you might need to consider a complete bowl replacement.
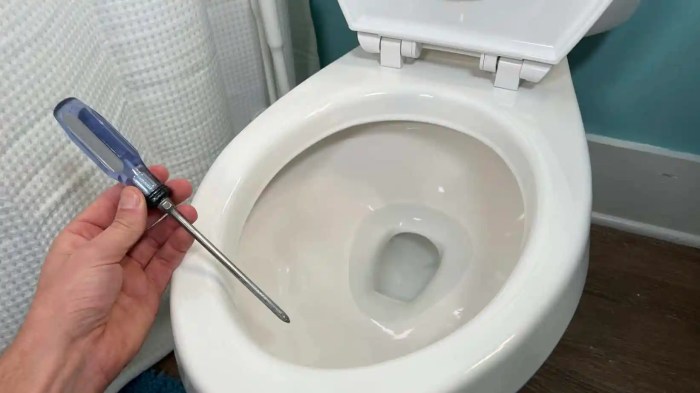
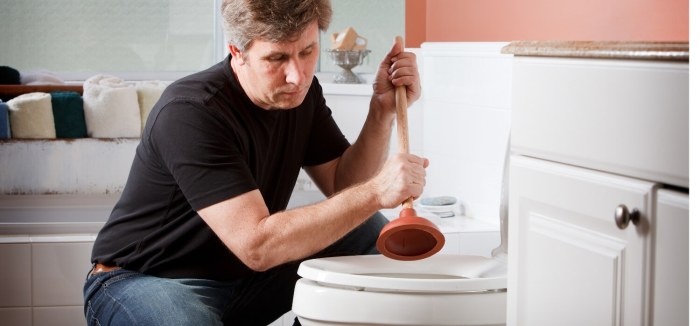
Unclogging a Shower Drain
Unclogging a shower drain requires a careful approach. Begin by inspecting the drain for any obvious obstructions. Use a drain snake to remove any clogs. If this doesn’t work, consider using a plunger to create suction and dislodge the blockage. If the problem is deeper in the drain line, a plumber’s snake might be necessary.
Shower Drain Unclogging: Step-by-Step Procedure and Tools
- Initial Inspection: Check the shower drain for any obvious clogs, like hair or soap scum. A clear view of the drain opening is needed to see any visible blockages.
- Drain Snake Application: If a clog is visible, try using a drain snake or plumber’s snake. Insert the snake into the drain and carefully rotate it to break up the clog. Make sure to apply steady pressure, but avoid excessive force that could damage the drain pipe.
- Plunger Technique: If the drain snake is unsuccessful, try using a plunger to create suction. Place the plunger over the drain opening and push and pull to dislodge the blockage. This method can sometimes work for shallower clogs.
- Advanced Techniques (Plumber’s Snake): If the problem persists, use a plumber’s snake. Carefully insert the snake into the drain, and rotate it while pushing it further down the drain line. This will help to break up and remove clogs in the drainpipe.
Images for Drain Unclogging Techniques (Illustrative descriptions, not images)
- Image 1: Shows a clear view of a shower drain with hair and soap scum clogging the drain. The caption would explain that visual inspection is crucial for identifying the source of the blockage.
- Image 2: Depicts the correct insertion of a drain snake into a drain opening. The caption should highlight the importance of steady, controlled pressure.
- Image 3: A properly positioned plunger over a shower drain. The caption should emphasize the use of the plunger’s suction to dislodge the blockage.
- Image 4: Demonstrates the correct way to use a plumber’s snake to remove a stubborn clog, showcasing the insertion technique and rotation needed to dislodge the clog.
Tools and Materials Needed
| Tool/Material | Description |
|---|---|
| Drain Snake | Remove clogs in the drain line. |
| Plumber’s Snake | For tackling tougher, deeper clogs. |
| Plunger | Creates suction to dislodge blockages. |
| Gloves | Protection against debris. |
| Bucket | For containing water and debris. |
Prevention Strategies
Source: happyhiller.com
Preventing shower and toilet overflows is all about proactive maintenance and mindful usage. By understanding the common causes of clogs and blockages, you can implement strategies to avoid future problems and save yourself the hassle and expense of repairs. Regular checks and simple adjustments to your habits can significantly reduce the risk of overflows.
Regular Maintenance Practices
Regular maintenance is key to preventing clogs and blockages. This proactive approach can prevent issues before they escalate into costly repairs. Thorough inspections and cleaning are essential for maintaining a healthy plumbing system. Cleaning out hair, soap scum, and debris from drains is crucial. These seemingly small tasks can save you from major plumbing problems down the road.
- Inspecting drains regularly: Checking drains for any signs of blockage, such as slow draining or unusual noises, is a crucial step in preventing clogs. Inspecting drains regularly allows for early intervention and prevents clogs from forming into more serious problems.
- Cleaning shower and tub drains: Regular cleaning of shower and tub drains helps remove hair, soap scum, and other debris that can accumulate and cause blockages. Use a drain cleaner or a simple plumbing snake to remove any build-up. This will help prevent the drain from becoming completely clogged.
- Cleaning toilet traps: Regularly cleaning the toilet trap helps prevent clogs by keeping it clear of debris and buildup. Use a plunger to dislodge any trapped materials that may be causing a blockage.
Using Showers and Toilets Wisely
Using showers and toilets effectively can significantly reduce the risk of overflows. Conscious habits and awareness of potential problems can prevent significant damage.
- Avoid flushing inappropriate items: Flushing non-toilet items, such as sanitary napkins, paper towels, or feminine hygiene products, can lead to clogs. Only flush toilet paper. This seemingly simple rule can save you from costly plumbing repairs.
- Adjust water usage: Shortening shower times and fixing any leaks can drastically reduce water consumption, lessening the strain on your plumbing system. This simple measure can help prevent overflow issues.
- Do not overload the toilet: Avoid overloading the toilet with too much waste. This can lead to clogs and potential overflows. Ensure you aren’t putting more waste in the toilet than it’s designed to handle.
Comparing Prevention Methods
Different methods for preventing clogs offer varying degrees of effectiveness and ease of implementation. Understanding the advantages and disadvantages of each approach is crucial for selecting the best solution.
- Plumbing snake: A plumbing snake is a flexible tool that can reach into drains and remove blockages. Its effectiveness depends on the type and location of the clog. It’s often effective for small to medium clogs, but may not be ideal for large or stubborn blockages.
- Drain cleaner chemicals: Drain cleaner chemicals can dissolve clogs, but they can also damage pipes if used improperly. They are effective in some cases, but use them cautiously and follow the instructions carefully.
Do’s and Don’ts for Plumbing Maintenance
Following a set of guidelines can help you maintain your plumbing system and prevent overflows.
| Do | Don’t |
|---|---|
| Inspect drains regularly. | Flush non-toilet items down the toilet. |
| Clean shower and tub drain regularly. | Use harsh chemicals without proper precautions. |
| Clean toilet traps regularly. | Overload the toilet. |
| Report any leaks promptly. | Ignore slow drains or unusual noises. |
Understanding the Plumbing System
Source: tagvault.org
Plumbing systems are the silent heroes of our homes, quietly transporting water and waste. Understanding their basic structure and function can help you troubleshoot problems and even prevent them in the future. This section delves into the inner workings of your shower and toilet plumbing, highlighting crucial components and how they interact.
The plumbing system is essentially a network of pipes, valves, and fixtures working together to deliver water and remove waste. Think of it as a complex highway system for water, with specific lanes and exits for different functions. Let’s break down the key components and their roles.
Basic Structure of a Plumbing System
The plumbing system comprises interconnected pipes that transport water and wastewater. Water supply lines bring water from the main water source to fixtures like showers and toilets. Drainage lines carry wastewater away from these fixtures. These two systems, while connected, operate independently. Critical to this flow are the appropriate connections and pathways for each fixture.
Water Supply System
The water supply system brings water from the main water line into your home. Water is delivered under pressure to your fixtures. This system consists of:
- Water Main: The main water line that enters your home.
- Water Meter: Measures the amount of water used.
- Supply Pipes: Transport water from the main line to specific fixtures.
- Shut-off Valves: Control the flow of water to individual fixtures, allowing for repairs or maintenance without turning off the entire supply.
- Fixtures: Showerheads, faucets, and toilets are examples of water fixtures. These are where water is used.
Drainage System
The drainage system removes wastewater from fixtures. This system is crucial for preventing backups and maintaining a healthy environment. It involves:
- Drainage Pipes: These pipes carry wastewater away from fixtures.
- Plumbing Fixtures: Shower drains, toilet bowls, and sink drains are all part of the system. They direct water to the drain pipes.
- Traps: These are crucial for preventing sewer gases from entering your home. They trap wastewater, preventing the gases from rising in the drain pipes.
- Vents: Allow air to enter the drainage pipes, maintaining pressure balance. This prevents vacuum issues.
- Main Drain: The main drainage pipe that carries wastewater away from the house to the municipal sewer system.
Types of Pipes
Different types of pipes are used in plumbing systems, each with its properties and potential weaknesses. Copper, PVC, and PEX are common choices. Each material has its pros and cons regarding durability, cost, and susceptibility to damage or clogging.
- Copper Pipes: Known for their durability and resistance to corrosion, but can be more expensive than other options.
- PVC Pipes: Common for their affordability and ease of installation. They are less prone to corrosion but can be susceptible to cracking under pressure.
- PEX Pipes: Highly flexible and resistant to corrosion. They are a popular choice for their durability and ease of installation.
Plumbing Components and Their Roles
Understanding the function of traps, vents, and other components is essential.
- Traps: A curved section of pipe that traps wastewater, preventing sewer gases from entering your home. A common example is the “P-trap” under sinks and toilets.
- Vents: Allow air to enter the drainage system, preventing vacuum issues and maintaining proper water flow.
- Cleanouts: These are access points for cleaning or repairing clogs in the plumbing system. They are usually located at the base of vertical pipes.
Diagram of a Typical Plumbing System
(Imagine a simple diagram here. A horizontal pipe represents the water main, branching out into pipes going to showers and toilets. A vertical pipe would represent the drain line. Show a P-trap under the toilet and shower drain. Include a vent pipe running vertically. Label each component, including the water meter, supply lines, drainage lines, traps, and vents. Label water supply connections and drainage connections.)
DIY Repair vs. Professional Help
Source: multiscreensite.com
Deciding whether to tackle a plumbing problem yourself or call a pro can be tricky. Knowing the pros and cons, along with the potential costs and risks, will help you make the right choice. Sometimes, a seemingly simple fix can quickly become a bigger headache if not done correctly.
Attempting a DIY repair can save you money, but it could also lead to more costly problems down the line if you don’t have the right tools, skills, or knowledge. Conversely, hiring a professional plumber guarantees a job well done but comes with a price tag. This section will help you weigh the options and make an informed decision.
Advantages and Disadvantages of DIY Repairs
DIY repairs for plumbing issues, like overflowing showers or toilets, can be attractive for their potential cost savings. However, several factors should be considered. Success depends on your comfort level with plumbing work and access to the necessary tools and expertise.
- Advantages: DIY repairs can save money compared to professional help, especially for simple clogs or leaks. You gain the satisfaction of fixing the problem yourself and have greater control over the process. If the issue is minor and you have the right tools and experience, a DIY approach can save you significant time and effort compared to waiting for a plumber.
- Disadvantages: Improper repairs can lead to further damage, potentially costing more in the long run. DIY repairs might not address the root cause of the problem, requiring multiple attempts or additional repairs in the future. Mistakes in installation or repairs can cause water damage, affecting your home’s structural integrity or causing leaks that compromise the safety of the surrounding environment.
Cost and Time Commitment Comparison
Estimating the cost and time involved in DIY repairs versus professional help is crucial for informed decision-making.
- DIY Repairs: Costs associated with DIY repairs primarily involve the purchase of necessary tools and materials (e.g., pipes, fittings, sealant). Time commitment varies greatly based on the complexity of the repair. Simple repairs can be done in a few hours, while more complex ones may take a whole day or more.
- Professional Plumber: Hiring a plumber typically involves an upfront service call fee and hourly rates for labor. Additional charges might apply for parts, travel time, or emergency service. Time commitment is typically dictated by the plumber’s availability and the repair’s complexity, potentially ranging from a few hours to several days for major system replacements.
Situations Requiring Professional Help
There are situations where DIY repairs are ill-advised, and professional assistance is necessary. Safety and structural integrity should be prioritized.
- Complex plumbing systems: When dealing with intricate plumbing systems, specialized tools and knowledge are essential. Trying to fix a problem in a complex system without the necessary experience can lead to irreversible damage.
- Unknown issues: If you don’t know the exact cause of the overflow, it’s best to consult a professional. Trying to diagnose the issue yourself might worsen the problem, requiring more extensive repairs.
- Structural damage: If the overflow is accompanied by visible structural damage or signs of water intrusion (e.g., cracked walls, or mold growth), immediate professional intervention is critical.
- Unfamiliar plumbing systems: Trying to fix a plumbing issue in a house with an unfamiliar or outdated system can be problematic. A professional plumber will have the expertise to handle such situations.
Warning Signs for Professional Assistance
Recognizing warning signs is vital to preventing further complications. These signs often indicate a need for professional intervention.
- Recurring overflows: If the overflow problem persists despite attempts at DIY repairs, it signals a more significant issue needing professional attention.
- Strange noises: Unusual noises coming from the plumbing system (e.g., gurgling, banging) could indicate a serious problem that needs immediate professional assessment.
- Water damage: If water damage, such as mold or discoloration, is observed, immediate professional intervention is essential.
- Flooding: If the overflow results in significant flooding, contacting a professional plumber is crucial to prevent further damage.
DIY vs. Professional Help Summary
| Factor | DIY Repair | Professional Help |
|---|---|---|
| Cost | Potentially lower, depending on materials | Higher, but can prevent further damage |
| Time Commitment | Variable, depending on complexity | Variable, depending on complexity and availability |
| Expertise | Requires plumbing knowledge and tools | Ensures proper diagnosis and repair |
| Safety | Potential hazards if not done correctly | Minimizes risk of further damage |
| Risk of Further Damage | High if not done correctly | Minimized due to expertise |
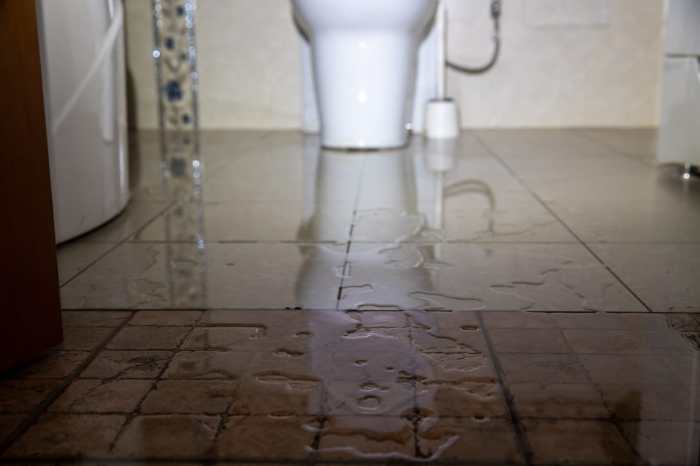
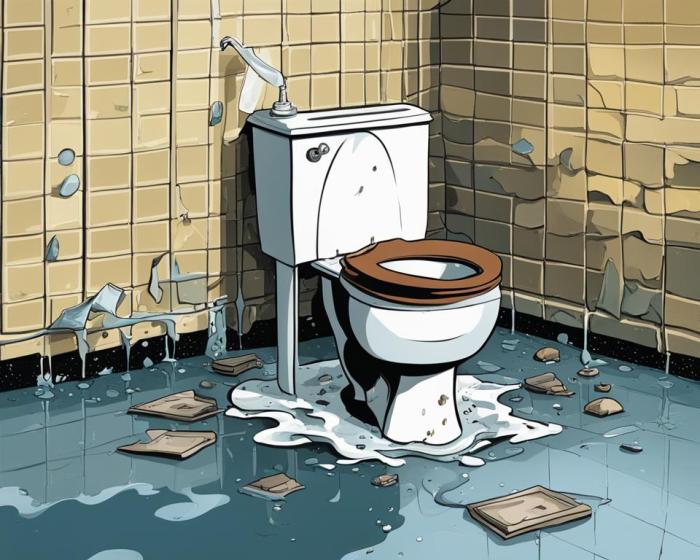
Emergency Overflow Procedures: Shower And Toilet Overflowing

Source: thrfun.com
Dealing with a flooded shower or overflowing toilet can be stressful, but knowing the immediate steps to take can minimize damage and prevent further problems. This section articulates crucial emergency procedures to handle these situations safely and effectively.
Immediate Actions
Quickly assessing the situation and taking immediate action is key to containing the water damage. First, turn off the water supply to the affected area. This is crucial to prevent further flooding. Once the water supply is shut off, focus on containing the water that’s already accumulated. Use towels, buckets, or other absorbent materials to soak up the excess water and prevent it from spreading to other parts of the house.
Shutting Off the Water Supply, Shower and toilet overflowing
Knowing where your water shutoff valves are is vital in an emergency. These valves are typically located in the basement, utility room, or near the water meter. Turn the valve clockwise to shut off the water. If you’re unsure of the location or if you’re uncomfortable with the task, call a professional plumber immediately. A plumber can quickly isolate the problem area and prevent further damage.
Containing the Water Damage
Preventing the water from spreading is essential to minimize the extent of the damage. Place towels or absorbent materials around the affected area to soak up water. Move furniture or belongings away from the water to prevent damage. If possible, use a wet-dry vacuum to extract excess water. If you have a sump pump, use it to remove water from the basement or other affected areas.
Safety Tips for Water Damage
Handling water damage can involve potential hazards. Never attempt to enter an area that is flooded or has standing water without proper safety gear. Electrocution is a significant risk in these situations. Always make sure the area is properly ventilated to avoid mold and mildew growth. Disconnect any electrical appliances near the affected area.
Emergency Plumbing Contacts
Having a list of emergency plumbing contacts readily available can be invaluable during a plumbing emergency. Contact your local plumbing service or a reputable company with experience in handling water damage. Also, consider having emergency contact numbers for your homeowner’s insurance and other necessary services.
- Local Plumbers: Contact local plumbers or plumbing service companies listed in your phone book, online directory, or through recommendations. Have a few names and numbers ready.
- Homeowners Insurance: Report the incident to your homeowner’s insurance company to initiate the claims process. Their emergency line can guide immediate steps.
- Emergency Services (if necessary): If the situation involves electrical issues, or if the water damage extends to hazardous levels, contact local emergency services for assistance.
Final Conclusion
Source: babylonbee.com
So, there you have it – a complete guide to dealing with overflowing showers and toilets. Armed with this knowledge, you’re now equipped to tackle any plumbing problem that arises. Remember, prevention is key, and regular maintenance can save you a lot of headaches and money in the long run. If a problem seems too complex, don’t hesitate to call a professional. But hopefully, you’ll be able to handle most issues on your own!